Clawbot个人AI助手
参考资料:Clawbot官方网址:https://clawbot.ai/
1.快速开始
1.1 安装环境
开始前,请确保您的硬件可以正常访问https://clawbot.ai/。打开命令行界面,输入:
curl -fsSL https://openclaw.ai/install.sh | bash
执行后需要输入用户密码,输入完成后等待安装完成。运行效果如下:
baiwen@dshanpi-a1:~$ curl -fsSL https://openclaw.ai/install.sh | bash

  🦞 OpenClaw Installer
  I don't judge, but your missing API keys are absolutely judging you.

✓ Detected: linux

Install plan
OS: linux
Install method: npm
Requested version: latest

[1/3] Preparing environment
· Node.js not found, installing it now
· Installing Node.js via NodeSource
· Administrator privileges required; enter your password
[sudo] password for baiwen:
sudo: a password is required
baiwen@dshanpi-a1:~$
baiwen@dshanpi-a1:~$
baiwen@dshanpi-a1:~$ curl -fsSL https://openclaw.ai/install.sh | bash

  🦞 OpenClaw Installer
  iMessage green bubble energy, but for everyone.

✓ Detected: linux

Install plan
OS: linux
Install method: npm
Requested version: latest

[1/3] Preparing environment
· Node.js not found, installing it now
· Installing Node.js via NodeSource
· Administrator privileges required; enter your password
[sudo] password for baiwen:
· Installing Linux build tools (make/g++/cmake/python3)
1.2 安全警告
安装成功后,会进入如下界面:
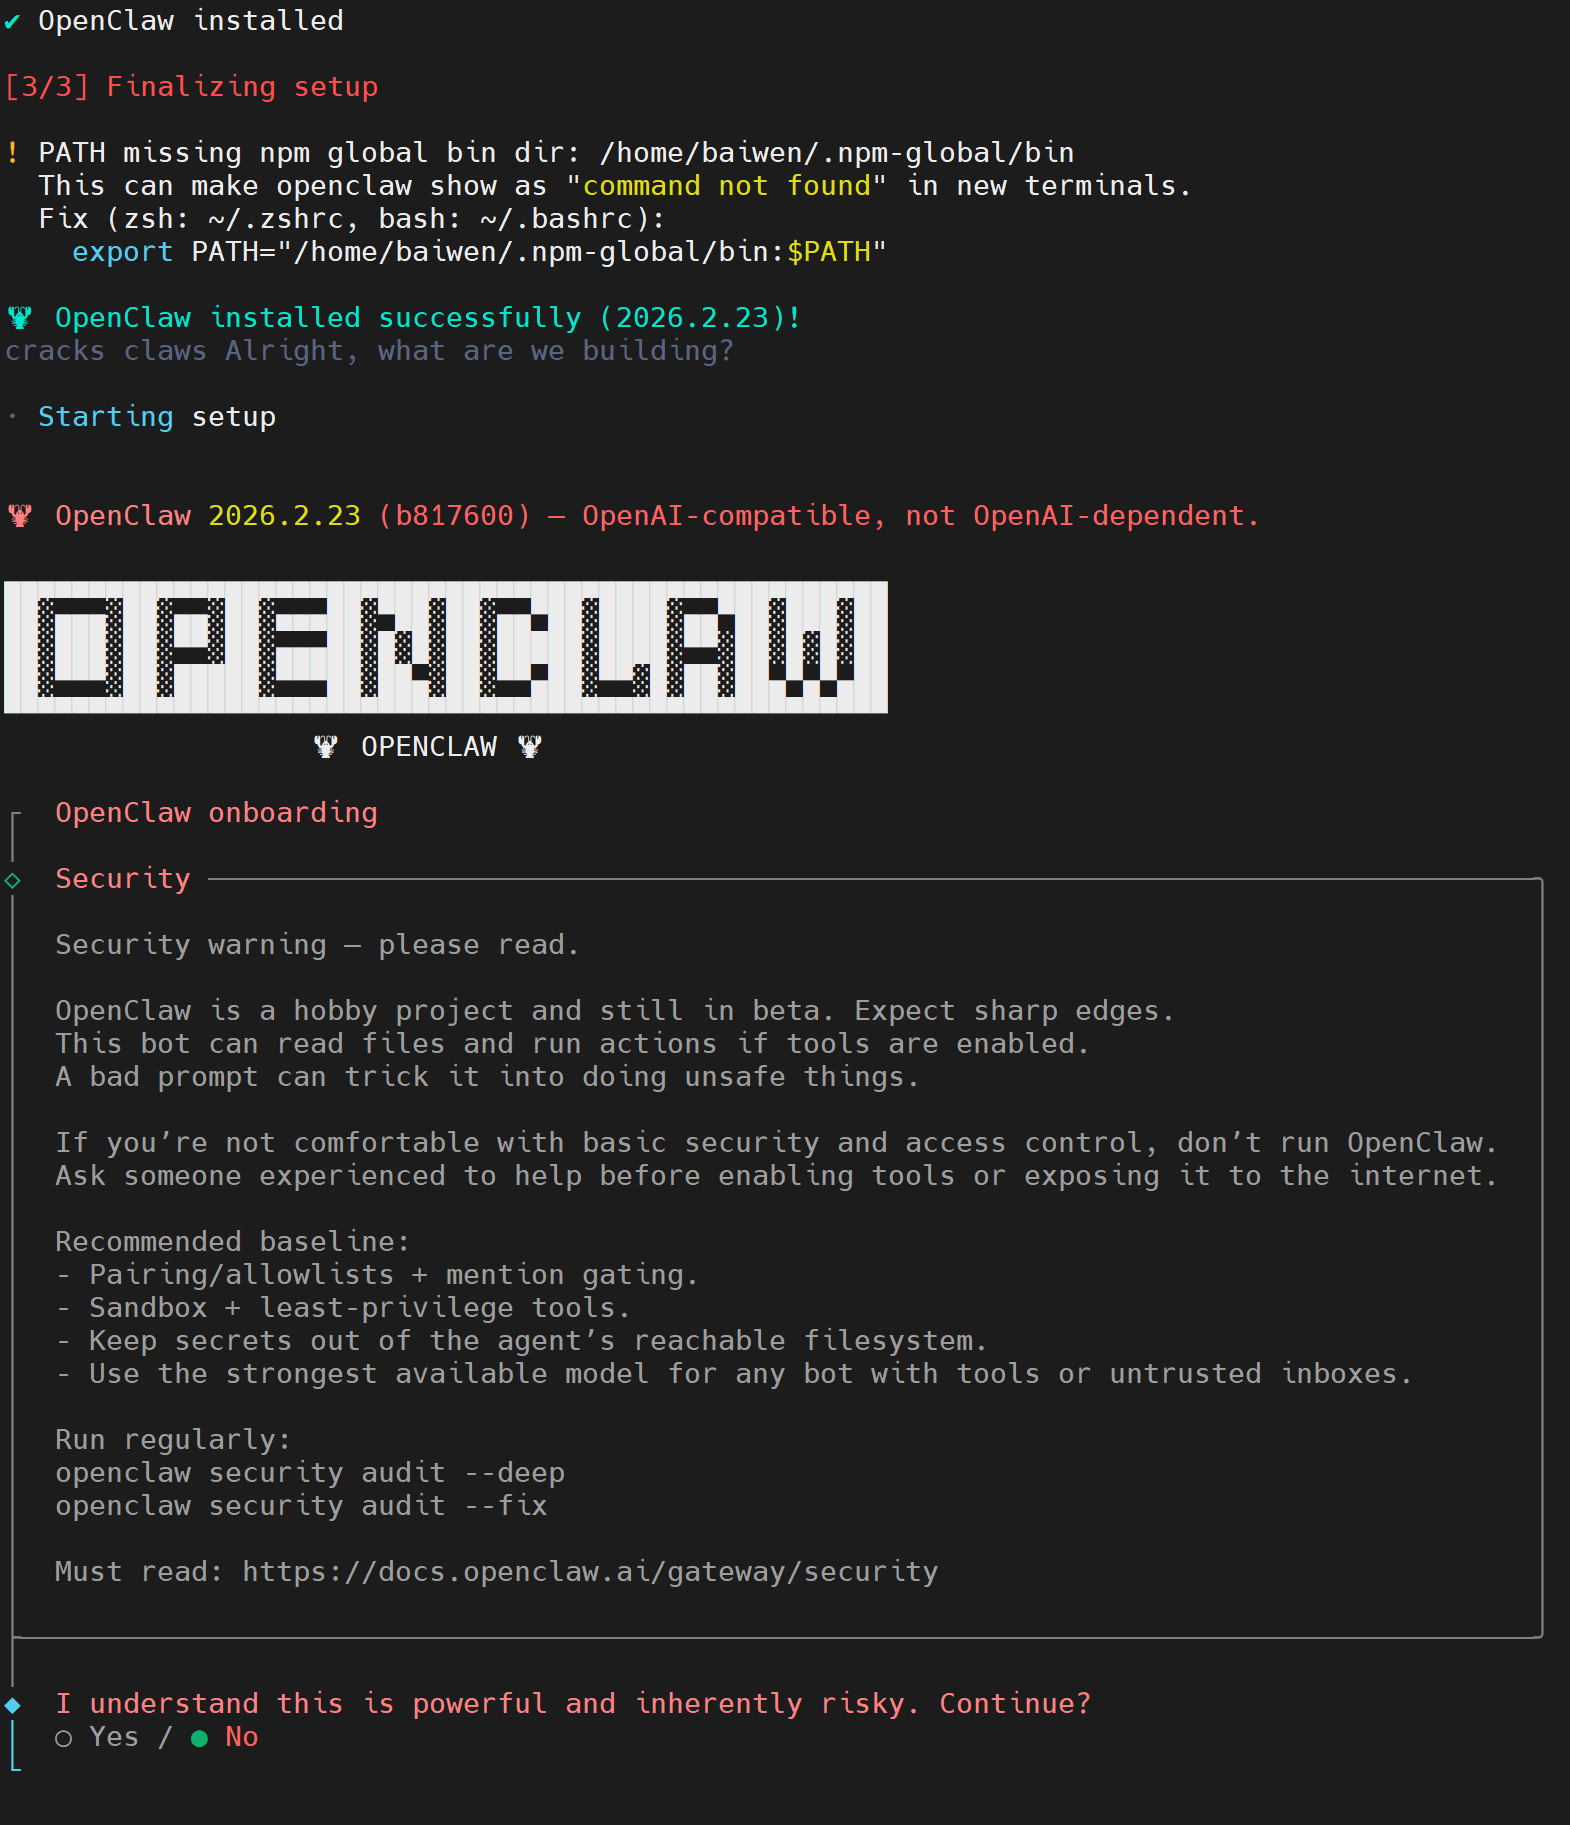
这里系统会显示一个安全警告,询问你是否理解风险并继续:
○ Yes- 是的,我理解风险,继续配置● No- 不,我不理解/不接受风险,退出
在命令行选择yes后按下回车。
1.3 模型选择
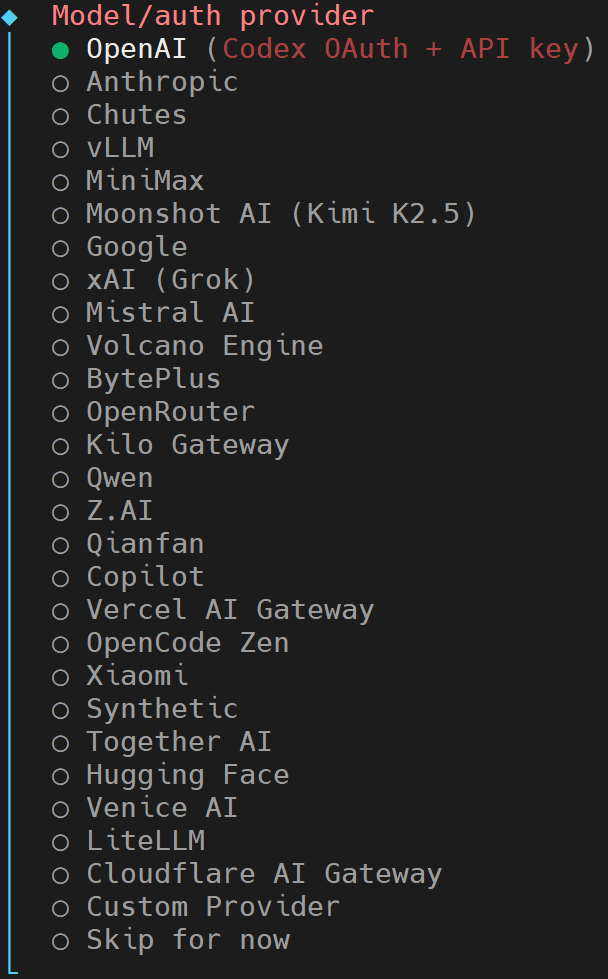
这里的模型需要根据您使用的模型来选择,使用方向键↑、↓进行选择,这里我选择Moonshot AI (Kimi K2.5)后,按下回车键。
Moonshot AI (Kimi K2.5) auth method
│  ○ Kimi API key (.ai)
│  ● Kimi API key (.cn)
│  ○ Kimi Code API key (subscription)
│  ○ Back
我这里继续选择使用Kimi API key (.cn)。
Enter Moonshot API key (.cn)
│ sk-kimi-xxxxxxxxxxxxxxxxxxxxxxxx
填入您购买的模型对应的API key,输入完成后按下回车。
◇  Model configured ────────────────────────╮
│                                           │
│  Default model set to moonshot/kimi-k2.5  │
│                                           │
├───────────────────────────────────────────╯
│
◆  Default model
│  ● Keep current (moonshot/kimi-k2.5)
│  ○ Enter model manually
│  ○ moonshot/kimi-k2.5
这里可以看到OpenClaw 已经自动识别出你使用的是Keep current (moonshot/kimi-k2.5),使用默认的即可。
◆  Select channel (QuickStart)
│  ○ Telegram (Bot API)
│  ○ WhatsApp (QR link)
│  ○ Discord (Bot API)
│  ○ IRC (Server + Nick)
│  ○ Google Chat (Chat API)
│  ○ Slack (Socket Mode)
│  ○ Signal (signal-cli)
│  ○ iMessage (imsg)
│  ○ Feishu/Lark (飞书)
│  ○ Nostr (NIP-04 DMs)
│  ○ Microsoft Teams (Bot Framework)
│  ○ Mattermost (plugin)
│  ○ Nextcloud Talk (self-hosted)
│  ○ Matrix (plugin)
│  ○ BlueBubbles (macOS app)
│  ○ LINE (Messaging API)
│  ○ Zalo (Bot API)
│  ○ Zalo (Personal Account)
│  ○ Synology Chat (Webhook)
│  ○ Tlon (Urbit)
│  ● Skip for now (You can add channels later via `openclaw channels add`)
这里先暂时跳过,后续可以再进行添加。
1.4 插件安装
Updated ~/.openclaw/openclaw.json
Workspace OK: ~/.openclaw/workspace
Sessions OK: ~/.openclaw/agents/main/sessions
│
◇  Skills status ─────────────╮
│                             │
│  Eligible: 5                │
│  Missing requirements: 39   │
│  Unsupported on this OS: 7  │
│  Blocked by allowlist: 0    │
│                             │
├─────────────────────────────╯
│
◆  Configure skills now? (recommended)
│  ● Yes / ○ No
此时会提示在告诉你 OpenClaw 的技能(Skills)系统状态:
| Eligible: 5 | 无需额外配置,立即可用的技能 | 有 5 个基础工具可用 |
|---|---|---|
| Missing requirements: 39 | 需要安装依赖才能启用的技能 | 39 个工具缺少 Node.js/Python 库等 |
| Unsupported on this OS: 7 | 当前系统不支持的技能(RK3576/ARM64) | 7 个工具可能仅支持 x86/macOS |
| Blocked by allowlist: 0 | 被安全策略阻止的技能 | 没有被阻止的 |
最后提示是否需要安装Skills工具插件,该工具可以用于读取本地文件/网络搜索/执行 Shell 命令/运行 Python 脚本/发送邮件等功能。这里我选择yes安装。
◆  Install missing skill dependencies
│  ◻ Skip for now
│  ◻ 🔐 1password
│  ◻ 📰 blogwatcher
│  ◻ 🫐 blucli
│  ◻ 📸 camsnap
│  ◼ 🧩 clawhub
│  ◻ 🎛️ eightctl
│  ◻ ♊️ gemini
│  ◻ 🧲 gifgrep
│  ◻ 🐙 github
│  ◻ 🎮 gog
│  ◻ 📍 goplaces
│  ◻ 📧 himalaya
│  ◻ 📦 mcporter
│  ◻ 🍌 nano-banana-pro
│  ◻ 📄 nano-pdf
│  ◻ 💎 obsidian
│  ◻ 🎙️ openai-whisper
│  ◻ 💡 openhue
│  ◻ 🧿 oracle
│  ◻ 🛵 ordercli
│  ◻ 🗣️ sag
│  ◻ 🌊 songsee
│  ◻ 🔊 sonoscli
│  ◼ 🧾 summarize (Summarize or extract text/transcripts from URLs, podcasts, and local files (great fallbac…)
│  ◻ 📱 wacli
│  ◻ 𝕏 xurl
我这里选择安装summarize(文本处理)和clawhub(技能管理器),选择完成后,按下回车即可。
1.5 包管理器选择
◆  Show Homebrew install command?
│  ● Yes / ○ No
这里选择No,由于Debian/Ubuntu 系的 Linux,自带的 apt 包管理器。
◆  Preferred node manager for skill installs
│  ● npm
│  ○ pnpm
│  ○ bun
└
选择npm作为ARM设备的包管理器。
1.6 地址功能
◆  Set GOOGLE_PLACES_API_KEY for goplaces?
│  ○ Yes / ● No
goplaces 是用于查询地点信息的技能(如搜索附近餐厅、地址解析等),这里选择No。
1.7 图像生成或多模态功能
◆  Set GEMINI_API_KEY for nano-banana-pro?
│  ○ Yes / ● No
└
nano-banana-pro 是一个需要 Google Gemini API 的扩展技能(图像生成或多模态功能),选择 No,直接按 Enter 回车。
1.8 后台服务
◇  Install gateway service now?
│  ● Yes / ○ No
Gateway service 是将 OpenClaw 作为后台守护进程运行,用于:
- 持续监听 Telegram/WhatsApp 等消息平台的消息(Webhook)
- 保持 24/7 在线,即使关闭终端也能响应
我这里选择yes。
◆  Gateway service runtime
│  ● Node (recommended) (Required for WhatsApp + Telegram. Bun can corrupt memory on reconnect.)
└
选择 Node (recommended),直接按 Enter 确认。
如果提示以下内容,表示询问是否为当前用户 baiwen 启用 systemd lingering(用户进程持久化)
◆  Enable systemd lingering for baiwen?
│  ● Yes / ○ No
└
这里选择yes。
2. 运行效果
程序运行成功提示如下内容,可以看到OpenClaw 的 Web 管理界面(Dashboard)已启动,可以使用浏览器访问Dashboard URL后的网址:http://127.0.0.1:18789/#token=xxxxx....
🦞 OpenClaw 2026.2.23 (b817600) — Gateway online—please keep hands, feet, and appendages inside the shell at all times.

Dashboard URL: http://127.0.0.1:18789/#token=xxxxxxxxxxxxxxxxxxxxxxxxxxxxxxxxxxxx
Copy to clipboard unavailable.
No GUI detected. Open from your computer:
ssh -N -L 18789:127.0.0.1:18789 baiwen@192.168.1.52
Then open:
http://localhost:18789/
http://localhost:18789/#token=xxxxxxxxxxxxxxxxxxxxxxxxxxxxxxxxxxxx
Docs:
https://docs.openclaw.ai/gateway/remote
https://docs.openclaw.ai/web/control-ui

FAQ: https://docs.openclaw.ai/start/faq
下面可以使用浏览器打开Dashboard URL的网址可显示如下界面:
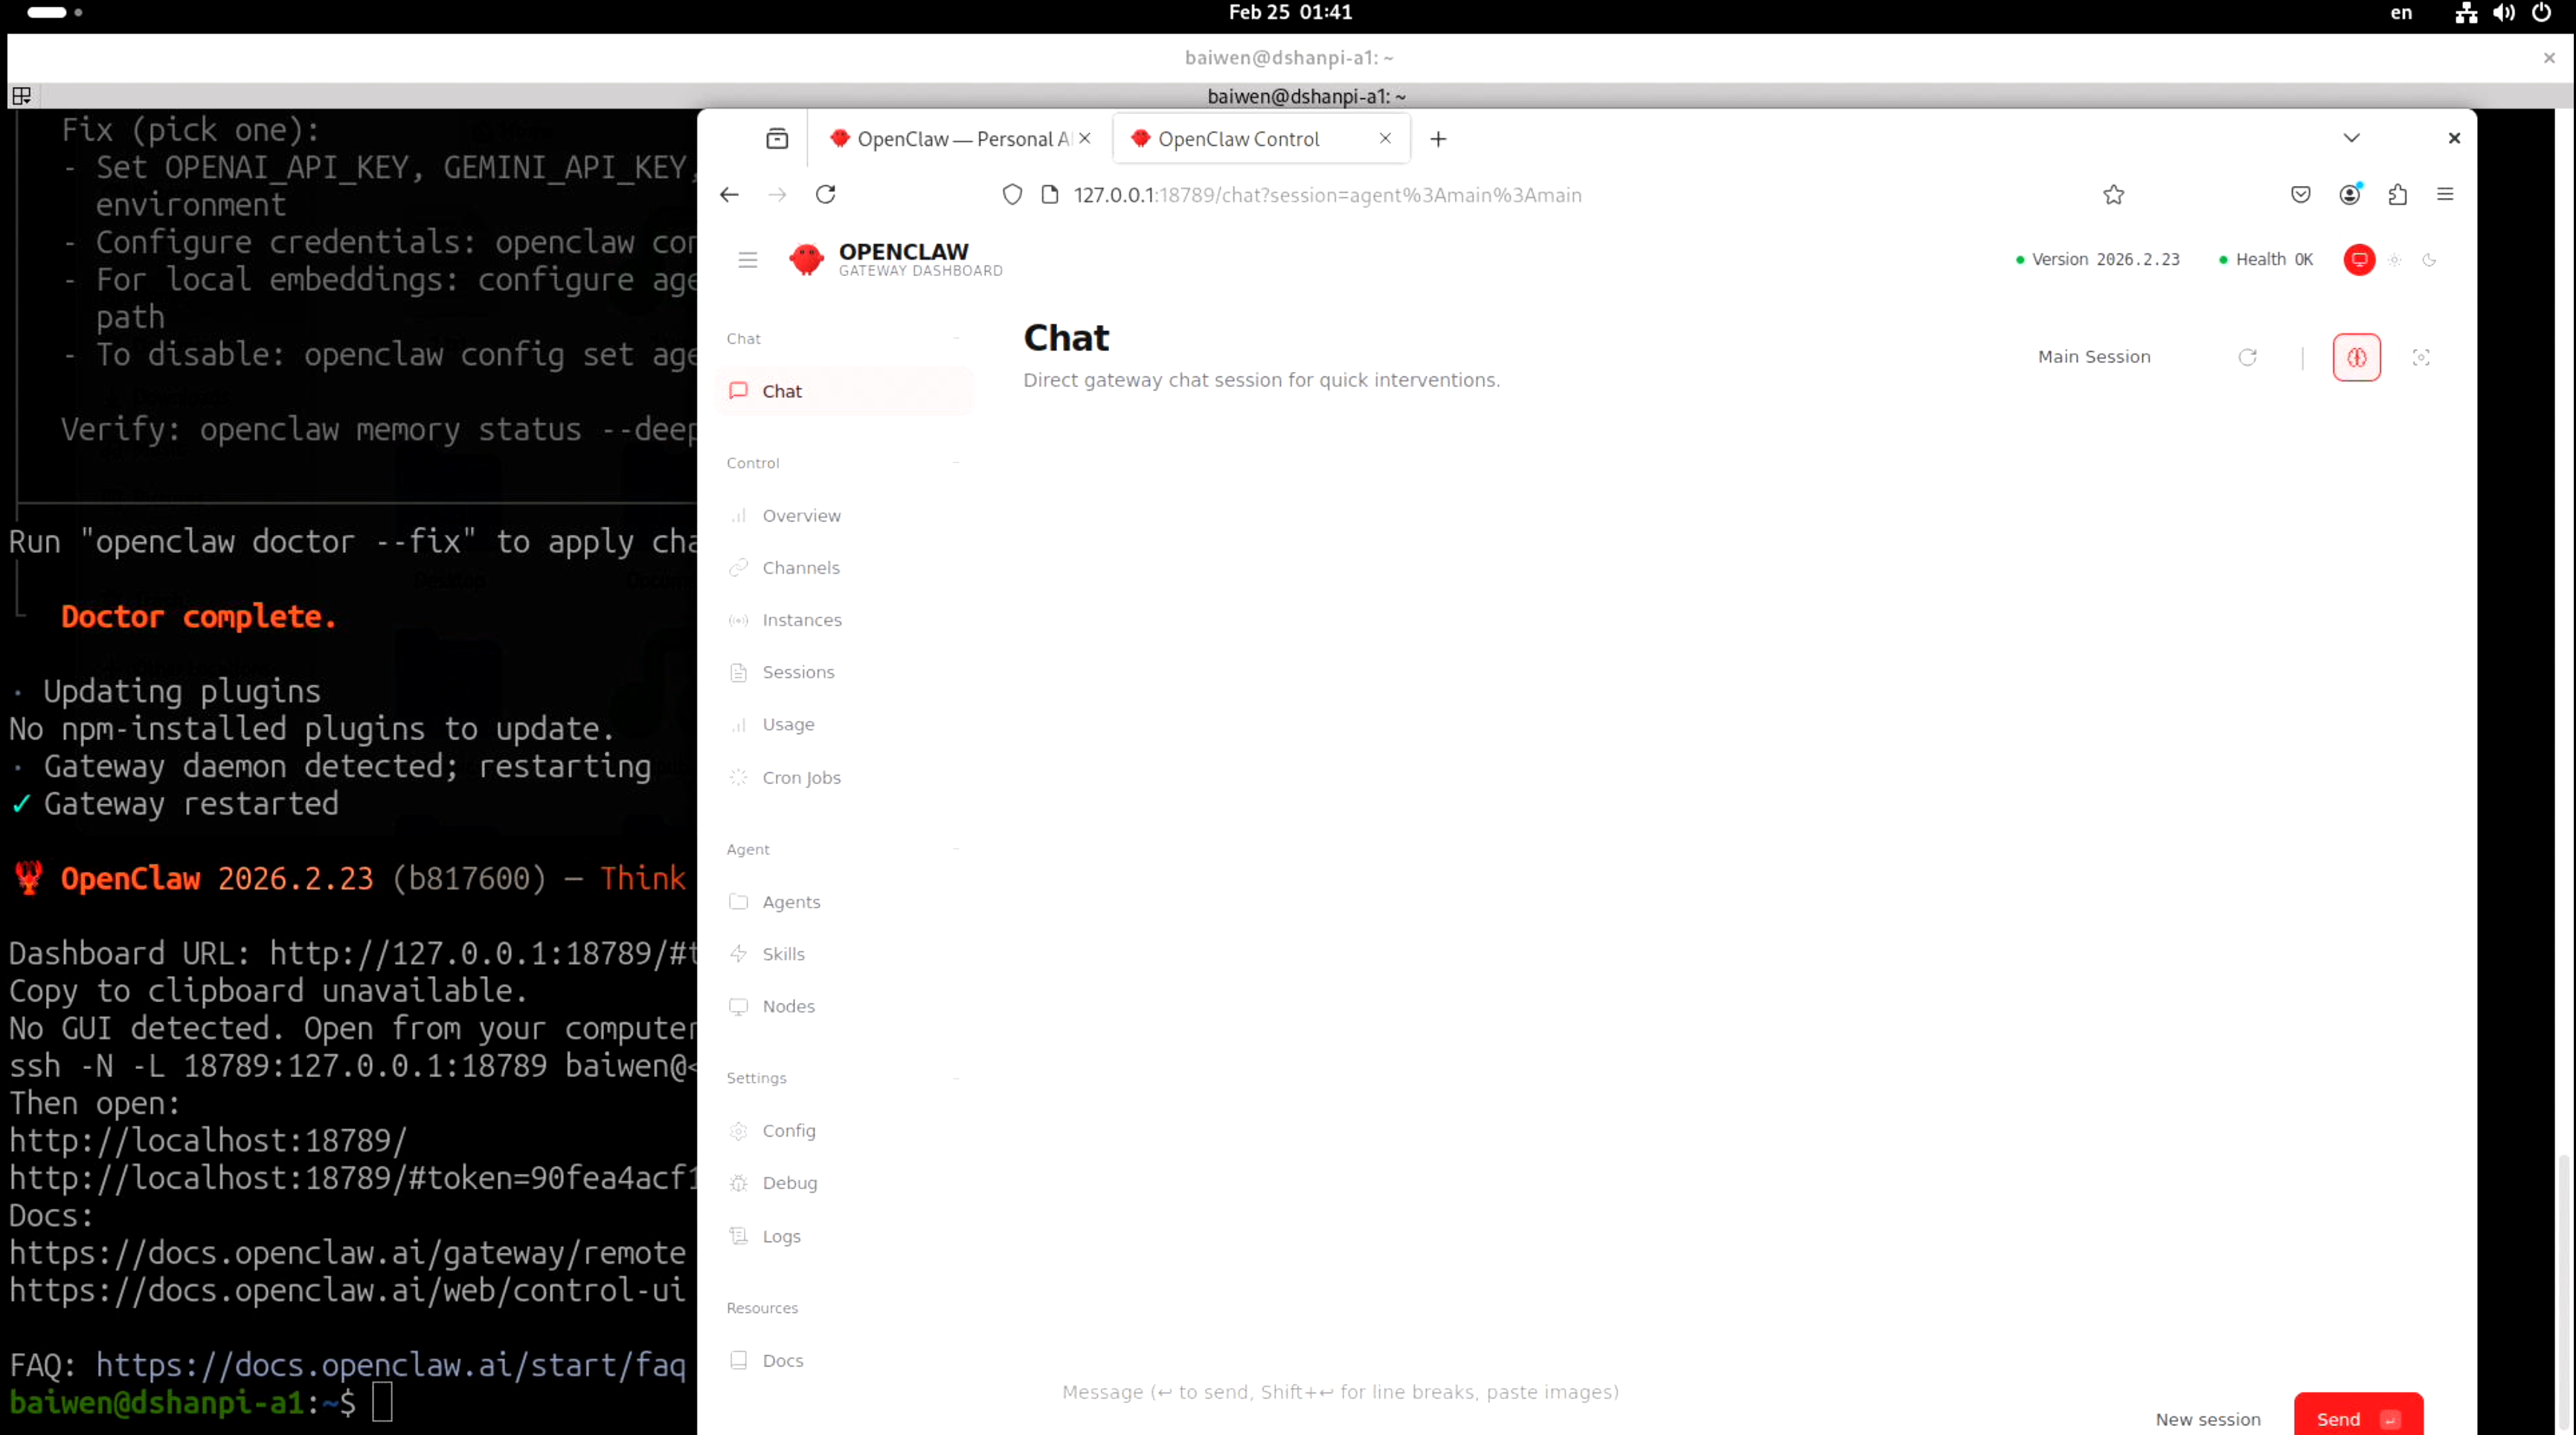
2.OpenClaw对话
在OpenClaw界面中选择overview,可以看到现在的clawbot系统情况。
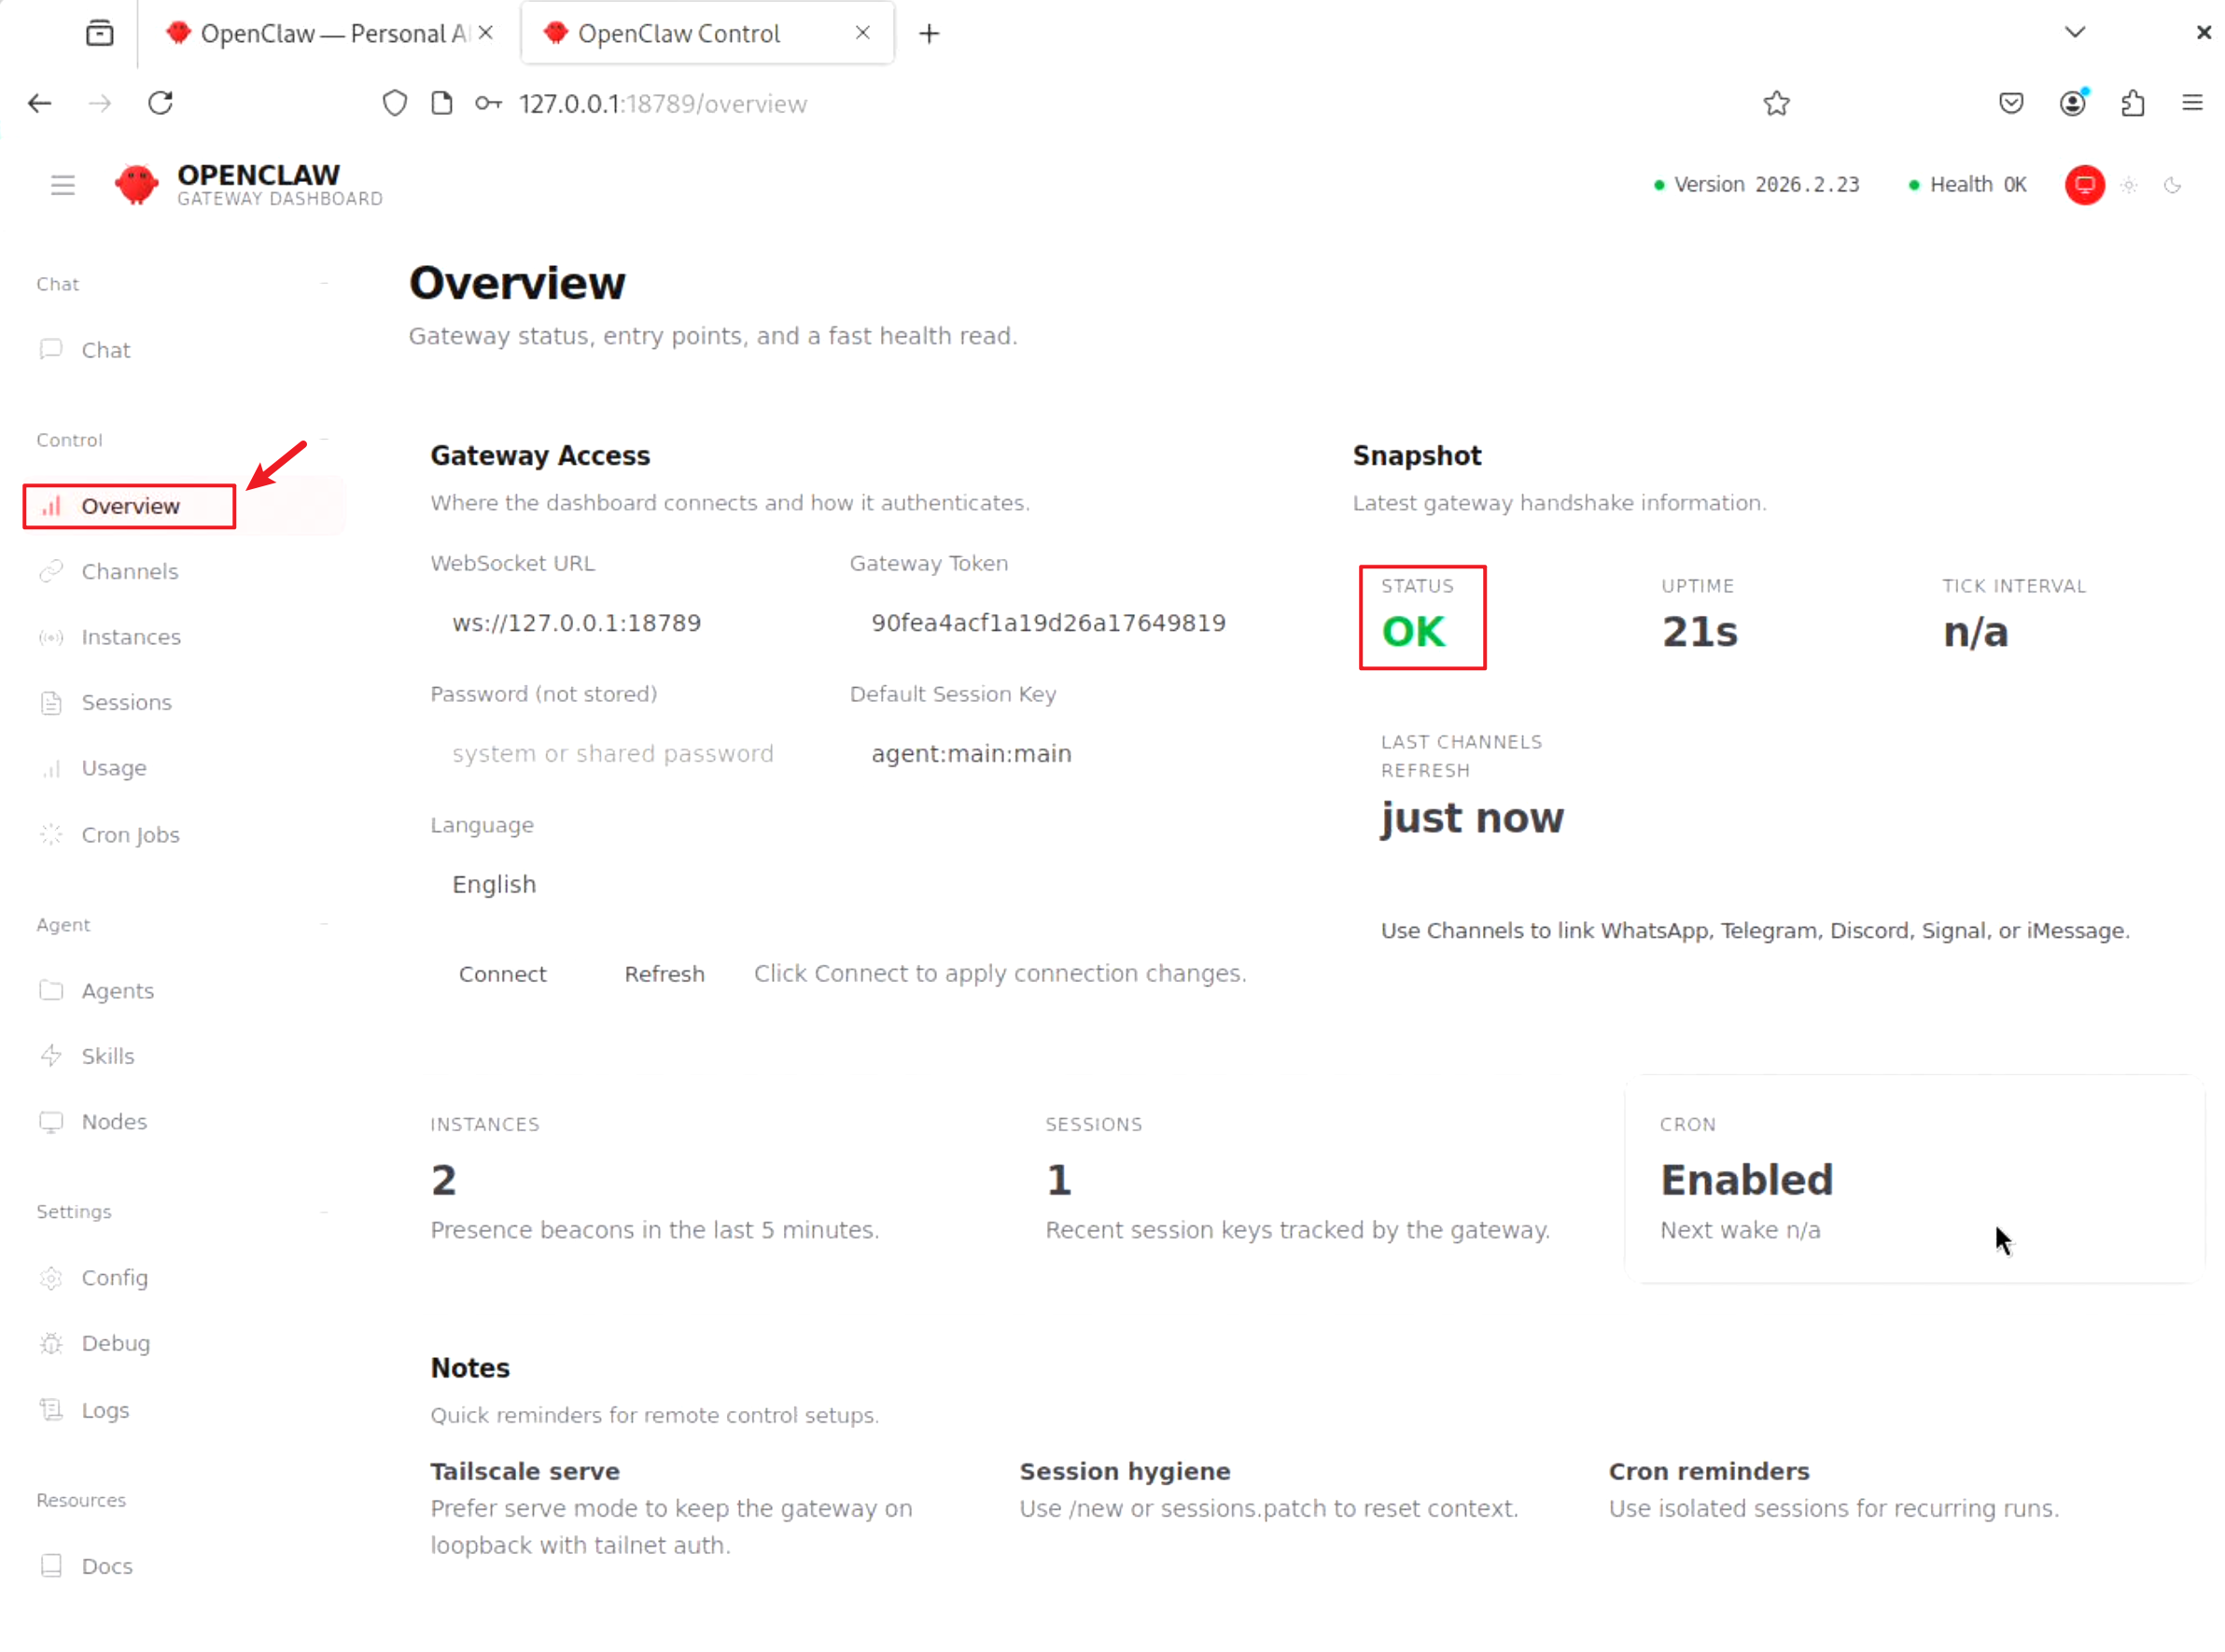
查看系统状态为OK。接下来可以回到chat对话界面进行验证:

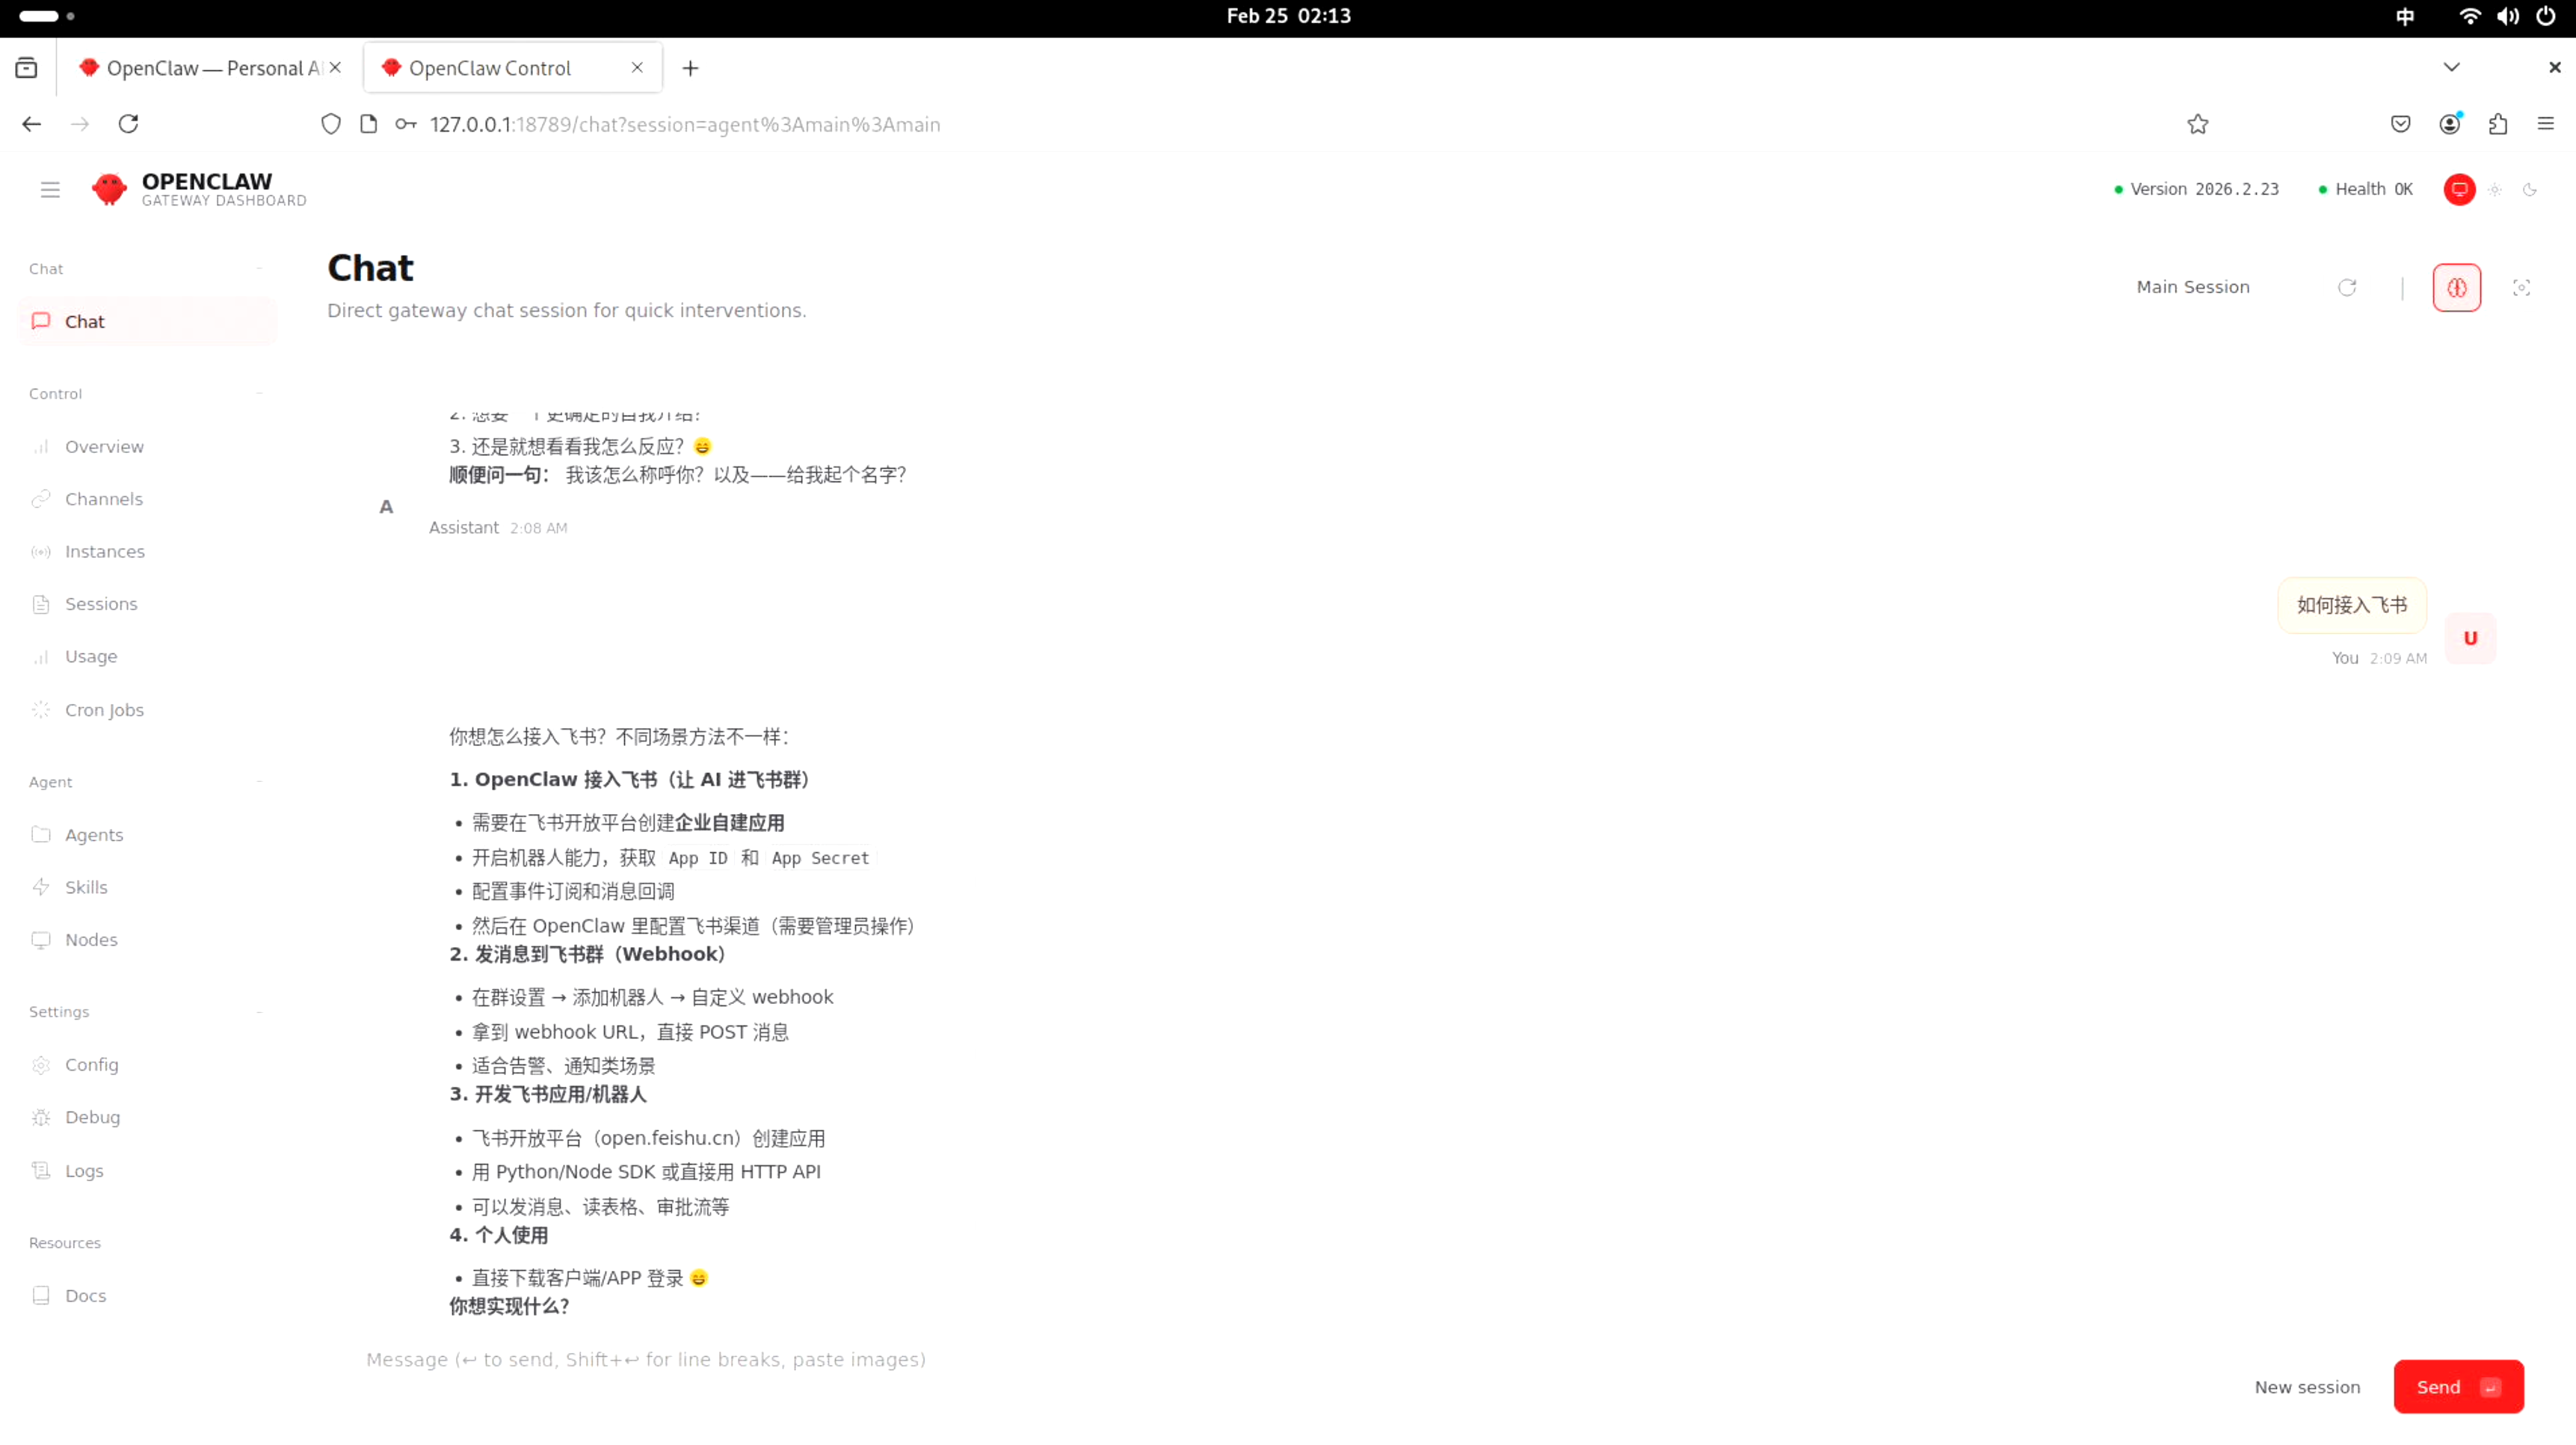
至此clawbot就部署成功了!更多好玩的玩法可以访问OpenClaw — Personal AI Assistant,挖掘更多个人AI助手的未来!
3.FAQ
1.如果发送对话后提示:HTTP 401: Invalid Authentication
原因:HTTP 401 表示 API Key 认证失败,OpenClaw 无法连接到你配置的 AI 服务,即填入的API Key有问题,需要重新填入。
解决办法:重新配置API Key,在命令行重新输入:
openclaw config
下面为步骤参考:
baiwen@dshanpi-a1:~$ openclaw config

🦞 OpenClaw 2026.2.23 (b817600) — Pairing codes exist because even bots believe in consent—and good security hygiene.

▄▄▄▄▄▄▄▄▄▄▄▄▄▄▄▄▄▄▄▄▄▄▄▄▄▄▄▄▄▄▄▄▄▄▄▄▄▄▄▄▄▄▄▄▄▄▄▄▄▄▄▄
██░▄▄▄░██░▄▄░██░▄▄▄██░▀██░██░▄▄▀██░████░▄▄▀██░███░██
██░███░██░▀▀░██░▄▄▄██░█░█░██░█████░████░▀▀░██░█░█░██
██░▀▀▀░██░█████░▀▀▀██░██▄░██░▀▀▄██░▀▀░█░██░██▄▀▄▀▄██
▀▀▀▀▀▀▀▀▀▀▀▀▀▀▀▀▀▀▀▀▀▀▀▀▀▀▀▀▀▀▀▀▀▀▀▀▀▀▀▀▀▀▀▀▀▀▀▀▀▀▀▀
                  🦞 OPENCLAW 🦞

┌  OpenClaw configure
│
◇  Existing config detected ─────────╮
│                                    │
│  workspace: ~/.openclaw/workspace  │
│  model: moonshot/kimi-k2.5         │
│  gateway.mode: local               │
│  gateway.port: 18789               │
│  gateway.bind: loopback            │
│                                    │
├────────────────────────────────────╯
│
◇  Where will the Gateway run?
│  Local (this machine)
│
◇  Select sections to configure
│  Model
│
◇  Model/auth provider
│  Moonshot AI (Kimi K2.5)
│
◇  Moonshot AI (Kimi K2.5) auth method
│  Kimi Code API key (subscription)
│
◇  Kimi Coding ────────────────────────────────────────╮
│                                                      │
│  Kimi Coding uses a dedicated endpoint and API key.  │
│  Get your API key at: https://www.kimi.com/code/en   │
│                                                      │
├──────────────────────────────────────────────────────╯
│
◇  Enter Kimi Coding API key
│  sk-kimi-xxxxxxxxxxxxxxxxxxxxxxxxxxxxxxxxxxxxxxxxxxxxxxxxx
│
◇  Model configured ──────────────────────╮
│                                         │
│  Default model set to kimi-coding/k2p5  │
│                                         │
├─────────────────────────────────────────╯
│
◇  Models in /model picker (multi-select)
│  2 items selected
Config overwrite: /home/baiwen/.openclaw/openclaw.json (sha256 4054bd1d2d21693ace9e4beaefe89a5936687689db96d7b5fc5cbc6113303263 -> 7003017741575dc94974df74aa88f416b394da847b843c383e5c843afedd67fa, backup=/home/baiwen/.openclaw/openclaw.json.bak)
Updated ~/.openclaw/openclaw.json
│
◇  Select sections to configure
│  Continue
│
◇  Control UI ───────────────────────────────────────────────────────────────────────────────╮
│                                                                                            │
│  Web UI: http://127.0.0.1:18789/                                                           │
│  Gateway WS: ws://127.0.0.1:18789                                                          │
│  Gateway: not detected (gateway closed (1006 abnormal closure (no close frame)): no close  │
│  reason)                                                                                   │
│  Docs: https://docs.openclaw.ai/web/control-ui                                             │
│
└  Configure complete.