3 posts tagged with "Gesture Recognition"

View All Tags

DshanPI-A1 Review Part 4: Modifying an Open-Source Gesture Project

· 7 min read
Yuxuan
100askTeam yuxuan.

All of the project modifications in this article are based mainly on compatibility, smoothness, screen display method, and camera invocation.

Display Output Adaptation

Main Adaptation Issues

1. RK3576 Runs a Pure Wayland Environment

RK3576 runs a pure Wayland environment with no X11 or libGL support, so the traditional cv2.imshow() cannot be used to display images.

[Solution]

Adopt the FIFO + GStreamer + Wayland display pipeline:

# Python side code
fifo = open('/tmp/gesture_fifo', 'wb')
while True:
_, jpeg = cv2.imencode('.jpg', processed_frame,
[cv2.IMWRITE_JPEG_QUALITY, 85])
fifo.write(jpeg.tobytes())
fifo.flush()
# Shell side code
# GStreamer reads the JPEG stream from the pipe and displays it
gst-launch-1.0 filesrc location=/tmp/gesture_fifo ! \
jpegparse ! jpegdec ! videoconvert ! waylandsink fullscreen=true

2. IMX415 Camera Color Anomaly on Second Launch

The IMX415 camera shows a color anomaly on its second launch, with the kernel reporting the error "no first iq setting".

[Solution]

Restart rkaiq_3A_server before each camera open:

def restart_3a(self):
os.system("killall rkaiq_3A_server 2>/dev/null")
time.sleep(2)
os.system("rm -f /tmp/.rkaiq_3A* 2>/dev/null")
os.system("/etc/init.d/S40rkaiq_3A start >/dev/null 2>&1")
time.sleep(5)

Project 1: Snake Game

Open-source project address: Project2/SnakeGame/main.py at main · WLHSDXN/Project2

Modification Process

1. Multi-Layer Detector Architecture

To accommodate different dependency environments, a three-layer detector fallback mechanism was designed:

Priority 1: cvzone (MediaPipe wrapper, high accuracy)
↓ unavailable
Priority 2: native MediaPipe (21 keypoints)
↓ unavailable
Priority 3: HSV skin-color detection (lightweight fallback)

Code implementation:

# Detector selection logic
if USE_CVZONE:
detector = CvzoneHandDetector(detectionCon=0.8, maxHands=1)
elif USE_MEDIAPIPE:
detector = MediapipeHandDetector(maxHands=1,
detectionCon=0.5,
drawLandmarks=False)
else:
detector = SimpleHandDetector() # HSV fallback solution

2. MediaPipe Integration and Wrapping

Implemented the MediapipeHandDetector class, returning a data format compatible with cvzone:

class MediapipeHandDetector:
def findHands(self, frame, flipType=False):
img_rgb = cv2.cvtColor(frame, cv2.COLOR_BGR2RGB)
results = self.hands.process(img_rgb)

hands = []
if results.multi_hand_landmarks:
for hand_landmarks in results.multi_hand_landmarks:
# Extract 21 keypoint coordinates
lmList = []
for lm in hand_landmarks.landmark:
x_px = int(lm.x * width)
y_px = int(lm.y * height)
lmList.append([x_px, y_px, lm.z])

hands.append({'lmList': lmList})

return hands, frame

[Key Point]

The index fingertip is lmList[8], used directly as the snake-head control point.

3. HSV Skin-Color Detection Fallback

When MediaPipe is unavailable, use simple skin-color detection:

def detect_hand_simple(frame):
hsv = cv2.cvtColor(frame, cv2.COLOR_BGR2HSV)
mask = cv2.inRange(hsv, [0, 30, 60], [255, 255, 255])

# Morphological denoising
kernel = np.ones((7, 7), np.uint8)
mask = cv2.morphologyEx(mask, cv2.MORPH_CLOSE, kernel, iterations=3)
mask = cv2.morphologyEx(mask, cv2.MORPH_OPEN, kernel, iterations=2)

contours, _ = cv2.findContours(mask, cv2.RETR_EXTERNAL,
cv2.CHAIN_APPROX_SIMPLE)
if contours:
c = max(contours, key=cv2.contourArea)
hull = cv2.convexHull(c)
# Extract the topmost point as the "fingertip"
topmost = hull[hull[:, :, 1].argmin()][0]
return topmost

4. MediaPipe Performance Tuning

Optimization 1: Use a Lightweight Model
self.hands = mp.solutions.hands.Hands(
model_complexity=0, # 0=lite, 1=full (default)
max_num_hands=1,
min_detection_confidence=0.5, # lower threshold for speed
min_tracking_confidence=0.5
)
Optimization 2: Disable Visualization Drawing
# Remove the time-consuming keypoint drawing
# mp_drawing.draw_landmarks(frame, landmarks, connections) # commented out
drawLandmarks=False # new switch
Optimization 3: Reduce Input Resolution
# 640x480 is already the optimal balance point
# Lowering further to 320x240 can boost FPS, but hurts detection accuracy
cap.set(cv2.CAP_PROP_FRAME_WIDTH, 640)
cap.set(cv2.CAP_PROP_FRAME_HEIGHT, 480)
Optimization 4: Optimize the Camera Buffer
cap.set(cv2.CAP_PROP_BUFFERSIZE, 1)  # reduce latency

[Optimization Effect]

FPS increased from 5-10 to 15-25 FPS, meeting the needs of game interaction.

5. File-Based Control Interface

Because keyboard input cannot be captured directly in FIFO mode, a control-file approach is used:

# Shell script section
# Read keypresses and write control files
stty echo icanon
while read n1 t 0.1 key; do
if [ "$key" = "r" ]; then
touch /tmp/snake_restart
elif [ "$key" = "q" ]; then
touch /tmp/snake_quit
fi
done
# Python section
# Detect control files
if os.path.exists('/tmp/snake_quit'):
print('Quit command detected')
break

if os.path.exists('/tmp/snake_restart'):
os.remove('/tmp/snake_restart')
# Reset game state
self.game.gameOver = False
self.game.points = []
self.game.previousHead = (0, 0)

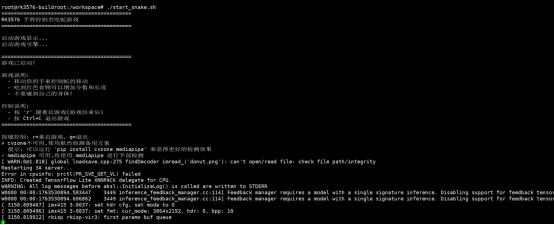
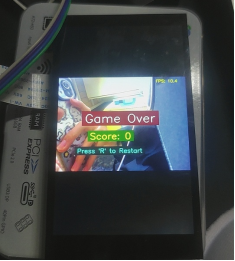
Effect Demonstration

The code and demo video are in the attachments.
img

img

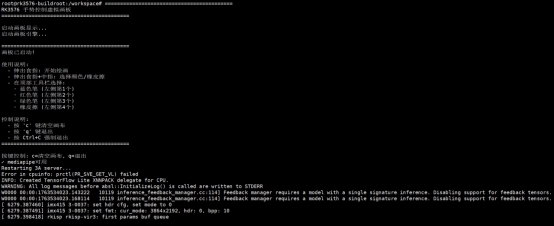
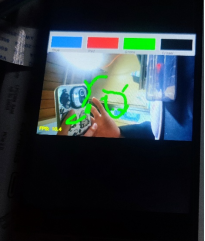
Project 2: Virtual Drawing Board

Open-source project: [Based on hand keypoint detection, air-control the mouse / air-draw] https://www.bilibili.com/video/BV1364y1h7PS?vd_source=a16ca768198c38baa684546cf5060811

Modification Process

1. Core Logic Extraction

Gesture Recognition Logic:
fingers = detector.fingersUp()  # returns 5 values, 1 means finger extended

# Mode 1: select tool (index + middle finger extended)
if fingers[1] and fingers[2]:
if y1 < 153: # in the top toolbar area
if 0 < x1 < 320: color = [50, 128, 250] # blue
elif 320 < x1 < 640: color = [0, 0, 255] # red
elif 640 < x1 < 960: color = [0, 255, 0] # green
elif 960 < x1 < 1280: color = [0, 0, 0] # eraser

# Mode 2: draw (only index finger extended)
elif fingers[1] and not fingers[2]:
cv2.line(imgCanvas, (xp, yp), (x1, y1), color, brushThickness)
Canvas Compositing Logic:
# 1. Convert the canvas to grayscale and binarize it
imgGray = cv2.cvtColor(imgCanvas, cv2.COLOR_BGR2GRAY)
_, imgInv = cv2.threshold(imgGray, 50, 255, cv2.THRESH_BINARY_INV)

# 2. Composite with bitwise operations
img = cv2.bitwise_and(img, imgInv) # keep non-drawing area of camera frame
img = cv2.bitwise_or(img, imgCanvas) # overlay drawing content

2. Display System Rebuild

Reuse the snake game's display solution: FIFO + GStreamer.

3. Toolbar Internalization

The original project depended on 4 PNG images as the toolbar, which is inconvenient for managing external resources on an embedded system.

[Solution]

Generate the toolbar with OpenCV drawing APIs:

def create_header(self):
"""Dynamically generate the toolbar"""
header = np.zeros((100, self.width, 3), np.uint8)
header[:] = (200, 200, 200) # gray background

tools = [
((250, 128, 50), "Blue"), # BGR format
((0, 0, 255), "Red"),
((0, 255, 0), "Green"),
((0, 0, 0), "Eraser")
]

section_width = self.width // 4
for i, (color, label) in enumerate(tools):
x1 = i * section_width
x2 = (i + 1) * section_width

# Draw color block
cv2.rectangle(header, (x1 + 10, 20), (x2 - 10, 80), color, -1)
cv2.rectangle(header, (x1 + 10, 20), (x2 - 10, 80),
(255, 255, 255), 2) # white border

# Text label
cv2.putText(header, label, (x1 + 20, 95),
cv2.FONT_HERSHEY_SIMPLEX, 0.5, (50, 50, 50), 1)

return header

This way there is zero dependency on external resources, which is better for porting and project development!

4. Camera and 3A Service Adaptation

Reuse the snake game's fix.

5. Resolution vs. Performance Trade-off

[Original Configuration]:

width = 1280, height = 720
canvas: imgCanvas = np.zeros((720, 1280, 3), np.uint8)

[RK3576 Optimization]

width = 640, height = 480  # reduce resolution by 50%
canvas: imgCanvas = np.zeros((480, 640, 3), np.uint8)

[Reasons]

  1. MediaPipe's FPS roughly doubles at 640x480
  2. The drawing-board application does not demand as high a resolution as vision recognition
  3. JPEG encoding/transmission is faster

[Toolbar Adaptation]

Original: 153 pixels tall at the top, divided into 4 regions 320 pixels wide RK3576: 100 pixels tall at the top, divided into 4 regions 160 pixels wide

section_width = self.width // 4  # adaptive width
if y1 < 100: # toolbar height
if 0 < x1 < section_width:
self.color = (250, 128, 50) # blue
elif section_width < x1 < section_width * 2:
self.color = (0, 0, 255) # red
# ...

6. Interaction Control Improvements

1. Clear-Canvas Mechanism

[Original]

if all(x >= 1 for x in fingers):
imgCanvas = np.zeros((720, 1280, 3), np.uint8)

[Problem]

High false-trigger rate; inconvenient for fine control.

[RK3576 Improvement]

Use keypress control:

# Shell side
while read -n1 -t 0.1 key; do
if [ "$key" = "c" ]; then
touch /tmp/painter_clear
fi
done
# Python side
if os.path.exists('/tmp/painter_clear'):
os.remove('/tmp/painter_clear')
self.imgCanvas = np.zeros((self.height, self.width, 3), np.uint8)
print("Canvas cleared")
2. Exit Control

[Original]

Can only capture the keyboard through cv2.waitKey(1), dependent on window focus.

[RK3576]

Dual exit mechanism:

  1. Keypress control: touch /tmp/painter_quit -> Python detects it and exits

  2. Ctrl+C: Shell script traps the signal -> kills all processes -> cleans up the FIFO

Effect Demonstration

The code and demo video are in the attachments.
img

img

Technical Summary and Lessons

  1. Cross-Platform Display Adaptation PC GUI solutions do not apply to embedded systems; the output method must be chosen based on system characteristics (Wayland/Framebuffer).

  2. Resource Internalization Embedded systems tend toward single-file deployment; external resources should be turned into code-generated content or packed into the program.

  3. Tiered Performance Optimization

    • Algorithm layer: lightweight models
    • Implementation layer: disable non-essential drawing
    • Hardware layer: buffer/resolution tuning
  4. Interaction Adaptation Keyboard/mouse events that GUIs depend on must be converted to file control or GPIO triggers.
DshanPI-A1 Review Part 3: OpenCV Debugging and CPU-Based Gesture Recognition Inference

· 10 min read
Yuxuan
100askTeam yuxuan.

Previously we finished debugging the camera and the screen, so now we can finally start working on gesture recognition!

This time I will implement a real-time, OpenCV-based gesture recognition system on the RK3576 Buildroot system. The system can recognize five gestures (fist/one finger, two, three, four, five fingers) and display the processing results on the screen in real time.

Given the particularities of embedded systems, we will focus on how to render images in a Wayland environment with no X11 and no OpenGL.

Gesture Recognition Algorithm

Principle

Because there are concavities between our spread fingers, we can accurately identify the number of fingers by calculating the angle and depth of these concavity points.

1. Skin Color Detection

Use the HSV color space to extract the skin-color region:

def detect_hand(self, frame):
hsv = cv2.cvtColor(frame, cv2.COLOR_BGR2HSV)
mask = cv2.inRange(hsv, [0, 30, 60], [25, 255, 255]) # skin color range

# Morphological processing for denoising
kernel = np.ones((7, 7), np.uint8)
mask = cv2.morphologyEx(mask, cv2.MORPH_CLOSE, kernel, iterations=3)
mask = cv2.morphologyEx(mask, cv2.MORPH_OPEN, kernel, iterations=2)

# Find the largest contour
contours, _ = cv2.findContours(mask, cv2.RETR_EXTERNAL, cv2.CHAIN_APPROX_SIMPLE)
if contours:
c = max(contours, key=cv2.contourArea)
if cv2.contourArea(c) > 3000: # area threshold to filter noise
return c, mask
return None, mask

2. Finger Counting (Convex Hull Defect Method)

Identify fingers by detecting the concavity points of the hand contour:

def recognize(self, contour):
hull = cv2.convexHull(contour, returnPoints=False)
defects = cv2.convexityDefects(contour, hull)

finger_count = 0
for i in range(defects.shape[0]):
s, e, f, d = defects[i, 0]
start = tuple(contour[s][0]) # convex point 1
end = tuple(contour[e][0]) # convex point 2
far = tuple(contour[f][0]) # concavity point (between fingers)

# Calculate the angle to determine whether it is a valid fingertip
a = np.linalg.norm(np.array(start) - np.array(end))
b = np.linalg.norm(np.array(start) - np.array(far))
c = np.linalg.norm(np.array(end) - np.array(far))
angle = np.arccos((b**2 + c**2 - a**2) / (2 * b * c))
if angle <= np.pi / 2.2 and d > 8000: # angle and depth thresholds
finger_count += 1

gestures = ["Fist/One", "Two", "Three", "Four", "Five"]
return gestures[finger_count]

How to Display the OpenCV-Processed Image

Theory alone is not enough - we need practice! How to display the OpenCV-processed image is the focus of this tutorial. Normally we use cv2.imshow() to display an image, but on an embedded system without X11/OpenGL this method is unavailable. We need to use the GStreamer + Wayland solution (the same approach as in our previous article).

Exploration of Solutions

Solution A: stdin Pipe Transmission

The most intuitive idea is to transmit image data through the stdin pipe:

proc = subprocess.Popen(['gst-launch-1.0', 'fdsrc', '!', ...], stdin=subprocess.PIPE)
proc.stdin.write(frame_data)

Result: Broken pipe errors occurred frequently and the data transmission was unstable. I suspect the pipe was timing out and closing automatically, or my format was wrong. So I directly tried using a FIFO to transmit raw data.

Solution B: Named Pipe (FIFO) for Raw Data Transmission

Try to transmit raw RGB data through a FIFO:

mkfifo /tmp/video_fifo

img

Unfortunately, this caused kernel crashes all too easily. At this point I was facing several problems: if I only used the command line to view the recognition results, I had no way of knowing whether the camera was running normally; but OpenCV and GStreamer reading the camera simultaneously was not possible (the camera can only be read by one process). Later I realized that the GStreamer display did not need to read the camera frame in real time - I only needed to display what OpenCV had processed. So I got to work, and tried to pass the OpenCV-processed image directly to the screen through GStreamer, but my skills were not up to the task and it came to nothing: the pipe either errored or closed. I stopped to think slowly, and finally came up with Solution C (getting to this step had already taken three days).

Solution C: Multi-File Sequence

Change the approach: save the processed images as a sequence of JPEG files:

# Python side
cv2.imwrite(f'/dev/shm/gesture_frames/frame_{frame_index:03d}.jpg', processed)
# GStreamer side
gst-launch-1.0 multifilesrc location=frame_%03d.jpg loop=true ! jpegdec ! ...

Result: The screen finally showed some movement - I was thrilled! But the effect was poor, with severe ghosting, and because it was reading the folder's images in a loop, it kept looping the playback, which hurt both the appearance and the experience. So I decided to leverage the FIFO and, building on the previous idea, upgrade it to the current solution:

OpenCV finishes processing a frame -> immediately encodes it as JPEG -> writes directly into the FIFO -> GStreamer immediately decodes and displays it

Solution D: FIFO + JPEG Stream (Final Solution!)

# Python side: write JPEG data directly into the FIFO
fifo = open('/tmp/gesture_fifo', 'wb')
_, jpeg = cv2.imencode('.jpg', processed, [cv2.IMWRITE_JPEG_QUALITY, 85])
fifo.write(jpeg.tobytes())
fifo.flush()
# GStreamer side: use jpegparse to automatically split JPEG frames
gst-launch-1.0 filesrc location=/tmp/gesture_fifo ! jpegparse ! jpegdec ! ...

Supplement: Why does the JPEG stream work?

  1. The JPEG format has built-in start (0xFFD8) and end (0xFFD9) markers
  2. GStreamer's jpegparse plugin can automatically recognize boundaries and split independent JPEG frames
  3. It avoids the packet-sticking problem of raw data streams

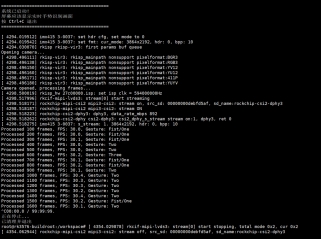
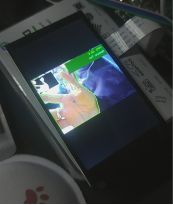
Result: At last I could observe the picture smoothly (the pipeline did not stutter - it was even smoother than directly opening the camera icon on the screen to view the camera feed). I will put the demo video and code in the attachments.

img img

Bonus - The Camera's Second Launch Was Greenish and Dark

Problem Description

I used the IMX415 camera on the RK3576 Buildroot system and displayed the picture through GStreamer + Wayland. I ran into a bizarre issue: the first time the camera was started the colors were normal, but after the second start the picture became dark and greenish.

img

Preliminary Analysis: Comparing the Boot Logs

First I compared the kernel logs of the two launches and found a key difference:

First launch (normal colors):

[20.528641] rkisp_hw 27c00000.isp: set isp clk = 594000000Hz
[20.529097] rkcif-mipi-lvds 3: stream[0] start streaming
[20.529317] rockchip-csi2-dphy 3: dphy3, data_rate_mbps 892
[20.529356] imx415 3-0037: s_stream: 1.3864x2192, hdr: 0, bpp: 10

Second launch (abnormal colors):

[79.209321] rkisp_hw 27c00000.isp: set isp clk = 594000000Hz
[79.209967] rkisp rkisp-vir3: first params buf queue
[79.210051] rkisp rkisp-vir3: id: 0 no first iq setting cfg_upd: c000dfecc7fe473b en_upd: 0 en s: 5ffcc7fe473b
[79.210351] rkcif-mipi-lvds 3: stream[0] start streaming

Key finding: the second launch had one extra warning no first iq setting. This indicates that the ISP's image quality parameters were not loaded correctly, causing wrong default parameters to be used, which made the colors dark and greenish.

Problem-Solving Process

Phase 1: Attempting a Hardware-level Fix

At first I thought the ISP driver state had not been reset correctly, and tried several methods:

  1. Attempt to unbind/bind the ISP driver:

    echo "27c00000.isp" > /sys/bus/platform/drivers/rkisp_hw/unbind
    echo "27c00000.isp" > /sys/bus/platform/drivers/rkisp_hw/bind

    Result: the camera could not be opened at all - the operation was too aggressive and completely messed up the driver state.

  2. Tried v4l2-ctl reset, media-ctl reset, etc., but none of them solved the problem.

Phase 2: In-Depth Diagnosis of the System Configuration

I began systematically diagnosing the entire camera subsystem:

# Find the IQ parameter file
find / -name "*imx415*.xml" -o -name "*imx415*.json" 2>/dev/null
# Result: found /etc/iqfiles/imx415_CMK-OT2022-PX1_IR0147-50IRC-8M-F20.json

# Check the 3A server
ps aux | grep rkaiq_3A_server
# Result: the server is running

# View device topology
v4l2-ctl --list-devices
# Confirm /dev/video-camera0 -> video11

Key findings:

  • The IQ parameter file exists
  • The 3A server (rkaiq_3A_server) is running
  • But why were the IQ parameters not loaded?

Phase 3: Capturing the 3A Server Log

I decided to run the 3A server in the foreground to view detailed output:

killall rkaiq_3A_server
/usr/bin/rkaiq_3A_server 2>&1 &

The startup log showed:

DBG: get rkisp-isp-subdev devname: /dev/v4l-subdev3
DBG: get rkisp-input-params devname: /dev/video18
DBG: get rkisp-statistics devname: /dev/video17
XCORE: K: cid[1] rk_aiq_uapi2_sysctl_init success. iq: /etc/iqfiles//imx415_CMK-OT2022-PX1_IR0147-50IRC-8M-F20.json
XCORE: K: cid[1] rk_aiq_uapi2_sysctl_prepare success. mode: 0
DBG: /dev/media1: wait stream start event..

Major finding: the 3A server was actually working fine! The IQ file had been loaded successfully!

At this point I ran a second camera launch test and observed:

[625.216117] rkisp-vir3: waiting on params stream one event timeout

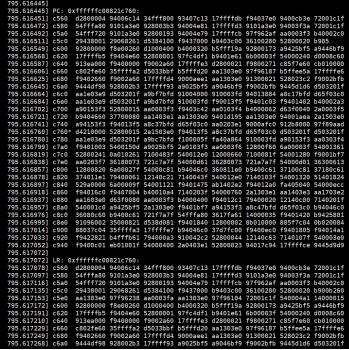
The truth came out: on the second launch, the 3A server timed out and did not respond!

Phase 4: Finding the Root Cause

Through multiple tests and log analysis, I finally understood the nature of the problem:

First launch flow (normal):

  1. When the system boots, the 3A server starts automatically
  2. The 3A server loads the IQ parameter file into memory
  3. The 3A server pre-prepares the IQ parameter buffer
  4. GStreamer starts the camera
  5. The ISP requests IQ parameters
  6. The 3A server responds immediately and pushes the IQ parameters
  7. Colors are normal

Second launch flow (abnormal):

  1. Stop the first GStreamer process
  2. The 3A server is still running, but has entered some waiting state
  3. The IQ parameter buffer has already been consumed
  4. GStreamer is restarted immediately
  5. The ISP requests IQ parameters
  6. The 3A server cannot respond in time or is in an abnormal state
  7. The ISP uses default parameters to process the first frame
  8. The no first iq setting warning appears
  9. Colors are dark and greenish

Solution

The root cause of the problem is: after the camera's first run, the 3A server enters an abnormal state and cannot correctly respond to the IQ parameter request of the second launch.

The final fix is simple: restart the 3A server before each camera launch.

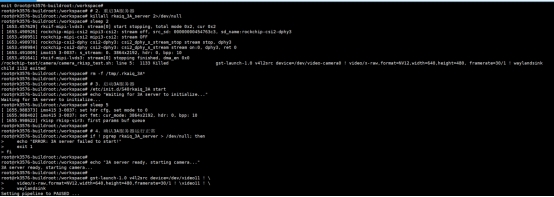
I wrote a wrapper script:

#!/bin/sh

echo "=== Starting Camera with 3A Server Reset ==="

# 1. Stop all camera processes
pkill -9 gst-launch 2>/dev/null

# 2. Restart the 3A server
killall rkaiq_3A_server 2>/dev/null
sleep 2
rm -f /tmp/.rkaiq_3A*

# 3. Start the 3A server
/etc/init.d/S40rkaiq_3A start
echo "Waiting for 3A server to initialize..."
sleep 5

# 4. Confirm the 3A server is running normally
if ! pgrep rkaiq_3A_server > /dev/null; then
echo "ERROR: 3A server failed to start!"
exit 1
fi

echo "3A server ready, starting camera..."

# 5. Start the camera
gst-launch-1.0 v4l2src device=/dev/video11 ! \
video/x-raw,format=NV12,width=640,height=480,framerate=30/1 ! \
waylandsink

echo "Camera stopped"
exit 0

img

Verification Result

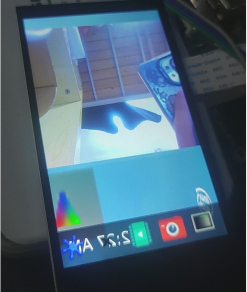
img

After using the new script, I started the camera several times in a row and the colors were always normal; the log no longer showed no first iq setting or timeout errors.

Lessons Learned

  1. Comparing logs is key to discovering problems: by comparing the logs of the normal and abnormal cases, I quickly located the key clue no first iq setting

  2. Diagnose systematically: do not blindly try things; first check the state of each component (IQ file, 3A server, device node)

  3. Run in the foreground to see detailed logs: many background-service problems require foreground execution to see detailed output

  4. Understand the cooperation between components: the RK platform's camera involves cooperation among the ISP driver, the 3A server, and the IQ parameter file - a problem in any link will cause an anomaly

  5. State management matters: embedded-system service-restart problems are often caused by improper state-machine management; a thorough reset is the most reliable solution.

DshanPI-A1 Review Part 2: Gesture Recognition Programming Environment Setup and Screen Debugging

· 6 min read
Yuxuan
100askTeam yuxuan.

In this review, I will install the necessary tools for the gesture recognition system and debug the screen.

Hardware and Environment Preparation

Before starting, let's clarify the equipment and environment on hand:

  • Core board: Dshanpi-A1, with the Rockchip RK3576 chip as the main SoC.

  • Screen: A 480x800 resolution MIPI screen.

  • System: Buildroot Linux system.

  • Official SDK

Install Development Tools

Here is the list for this time:

Package/Configuration CategoryRecommended Options and Purpose
Python Environmentpython3: Core interpreter. python-pip: Used to install Python packages not included in Buildroot. python-numpy: Provides efficient numerical computation support for OpenCV and other libraries. python-setuptools: A base build dependency for some Python packages.
Computer Vision and Image Processingopencv4: Be sure to enable python3 support. Provides the core computer vision library for image processing and gesture recognition algorithms. opencv4 contrib modules: Includes additional, more advanced algorithms.
Camera and Display Supportgstreamer1 and related plugins: Build pipelines for camera image capture and screen display. gst1-plugins-base, gst1-plugins-good, gst1-plugins-bad, gst1-plugins-ugly: Provide a rich set of codecs and functional elements. gst1-python: Allows creating and manipulating GStreamer pipelines in Python.

SDK Configuration Process

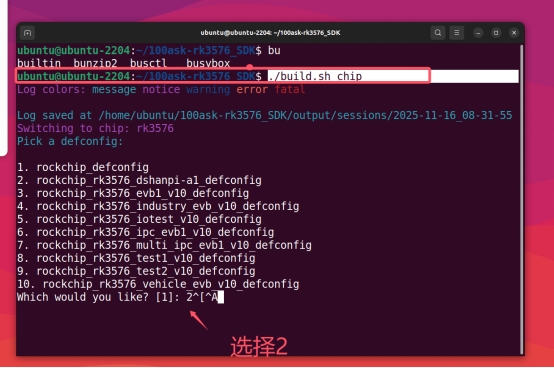
1. Select the Chip Type

./build.sh chip

img

img

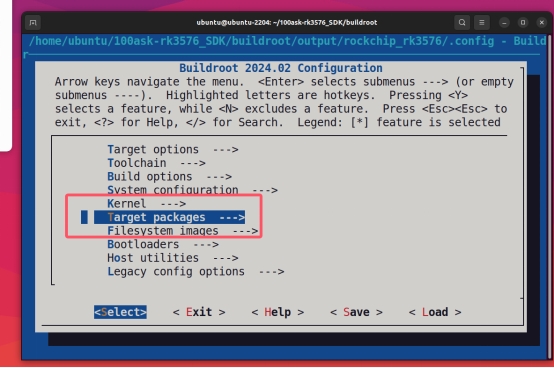
2. Enter buildroot Configuration

cd buildroot
make menuconfig

img

3. Select Target packages

img

4. Install the Python Environment

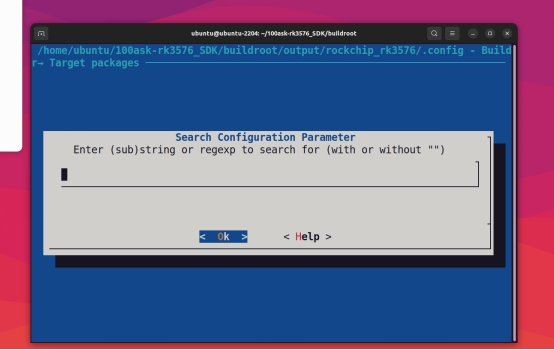
When you cannot find the installation path, press the / key to search:

img

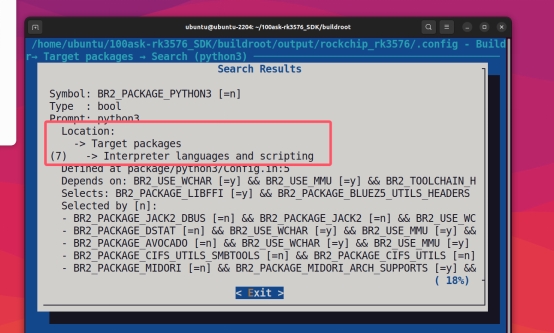
Enter python3 to search:

img

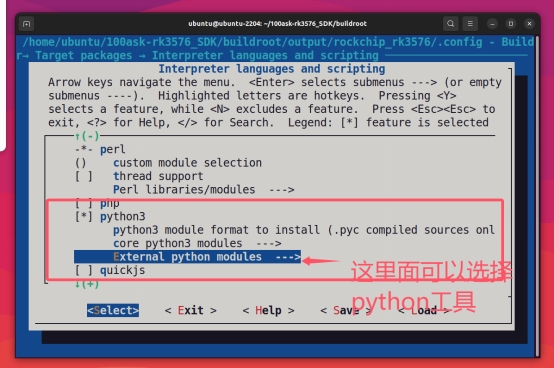
Enter the displayed Location path to configure:

img

img

5. Save the Configuration and Build

make

Return to the SDK main directory and run:

./build.sh rootfs
./build.sh updateimg

Finally, flash and run it on the development board.

Development Board Debugging

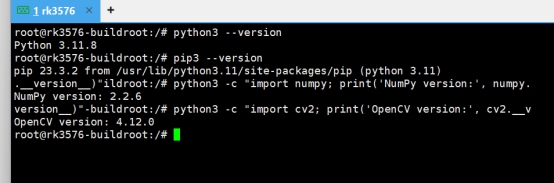
Check Tool Installation

python3 --version
pip3 --version
python3 -c "import numpy; print('NumPy version:', numpy.__version__)"
python3 -c "import cv2; print('OpenCV version:', cv2.__version__)"

img

Screen Debugging

Problem Analysis

The system is already running the Weston compositor, which means we have a graphical interface environment. Attempting to directly operate the FrameBuffer (/dev/fb0) is ineffective because Weston has already occupied the display interface.

Through system inspection, we found:

  • The /dev/fb0 device exists
  • The screen status is connected
  • The resolution is 480x800

img

Solution: GStreamer + Wayland

GStreamer Basic Test

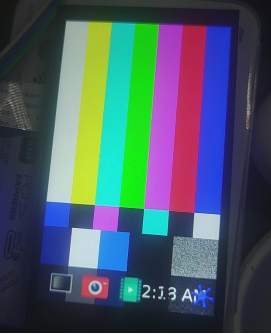
gst-launch-1.0 videotestsrc pattern=smpte ! video/x-raw,width=480,height=800 ! waylandsink sync=false

img

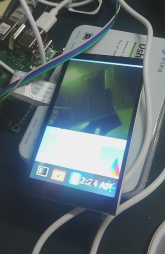
Camera Direct-to-Display Test

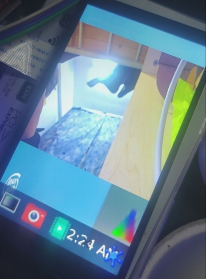
gst-launch-1.0 v4l2src device=/dev/video11 ! video/x-raw,width=640,height=480 ! videoconvert ! waylandsink sync=false

img

Note: Please replace the device parameter with your camera's device node

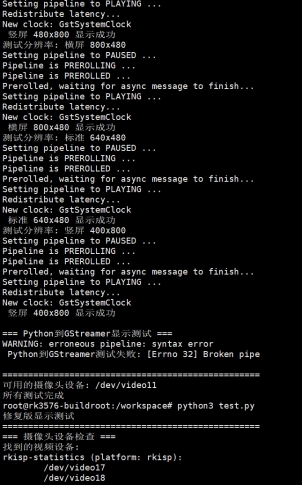
Test Script

#!/usr/bin/env python3
# fixed_display_test.py

import subprocess
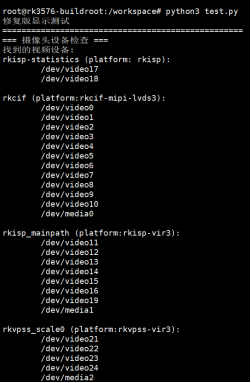
import time
import os

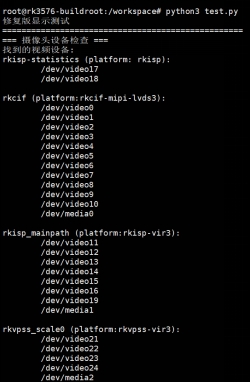
def check_camera_devices():
"""Check available camera devices"""
print("=== Camera Device Check ===")

try:
# Use v4l2-ctl to check devices
result = subprocess.run(["v4l2-ctl", "--list-devices"],
capture_output=True, text=True)
if result.returncode == 0:
print("Found video devices:")n print(result.stdout)
else:
print("v4l2-ctl command execution failed")
except Exception as e:
print(f"Failed to check camera devices: {e}")

# Test common camera devices
camera_devices = ["/dev/video11", "/dev/video0", "/dev/video1", "/dev/video2"]
print("\nTesting camera devices:")

for device in camera_devices:
if os.path.exists(device):
print(f"Testing device: {device}")
try:
# Try to test the camera using GStreamer
cmd = [
"gst-launch-1.0",
"-v",
"v4l2src", f"device={device}", "!",
"video/x-raw,width=640,height=480,framerate=15/1", "!",
"videoconvert", "!",
"waylandsink", "sync=false"
]

process = subprocess.Popen(cmd)
time.sleep(3) # Display for 3 seconds
process.terminate()
process.wait()
print(f" {device}: Camera working normally")
return device

except Exception as e:
print(f"{device}: Test failed - {e}")
else:
print(f"{device}: Device does not exist")

return None

def test_static_patterns():
"""Test static patterns (will not change)"""
print("\n=== Static Pattern Test ===")

# Set Wayland environment
os.environ['WAYLAND_DISPLAY'] = 'wayland-0'

# Test static patterns (will not change)
static_patterns = [
("smpte100", "SMPTE 100% color bars"),
("ball", "Clock pattern"),
("blink", "Blink pattern"),
("pinwheel", "Pinwheel pattern"),
("spokes", "Spokes pattern"),
]

for pattern, description in static_patterns:
print(f"Displaying: {description}")
try:
cmd = [
"gst-launch-1.0",
"videotestsrc", f"pattern={pattern}", "!",
"video/x-raw,width=480,height=800,framerate=15/1", "!",
"waylandsink", "sync=false"
]

process = subprocess.Popen(cmd)
time.sleep(3)
process.terminate()
process.wait()
print(f"{description} displayed successfully")

except Exception as e:
print(f"{description} display failed: {e}")

def test_custom_resolution():
"""Test custom resolution display"""
print("\n=== Custom Resolution Test ===")

resolutions = [
(480, 800, "Portrait 480x800"),
(800, 480, "Landscape 800x480"),
(640, 480, "Standard 640x480"),
(400, 800, "Portrait 400x800"),
]

for width, height, desc in resolutions:
print(f"Testing resolution: {desc}")
try:
cmd = [
"gst-launch-1.0",
"videotestsrc", "pattern=smpte100", "!",
f"video/x-raw,width={width},height={height},framerate=15/1", "!",
"videoconvert", "!",
"waylandsink", "sync=false"
]

process = subprocess.Popen(cmd)
time.sleep(2)
process.terminate()
process.wait()
print(f" {desc} displayed successfully")

except Exception as e:
print(f" {desc} display failed: {e}")

if __name__ == "__main__":
print("=" * 50)

# 1. Check camera
camera_device = check_camera_devices()

# 2. Test static patterns
test_static_patterns()

# 3. Test different resolutions
test_custom_resolution()

print("\n" + "=" * 50)
if camera_device:
print(f"Available camera device: {camera_device}")
else:
print("No available camera device found")
print("All tests completed")

img

img

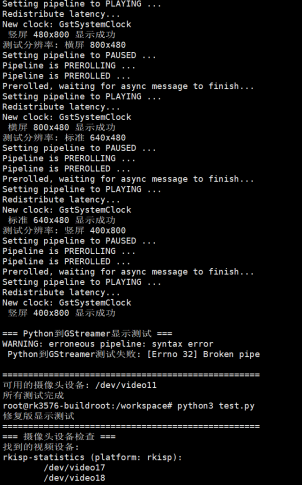
Run Results

image-20251222165424798

image-20251222165428939

I will put the demo video in the attachments

Bonus Chapter: FileZilla File Transfer

FileZilla Connection Settings

FileZilla - The free FTP solution

Check SSH Service

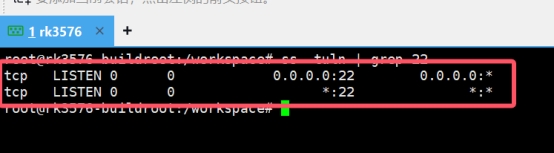
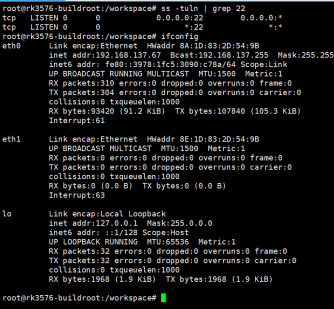
ss -tuln | grep 22

img

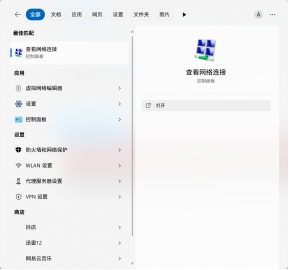
Network Sharing Settings

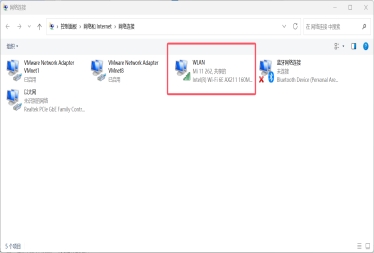
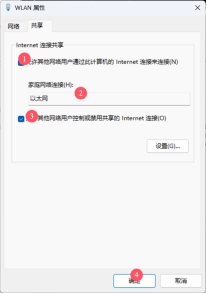
img

img

img

Select the network that can access the internet, and click Properties:

img

image-20251222165505322

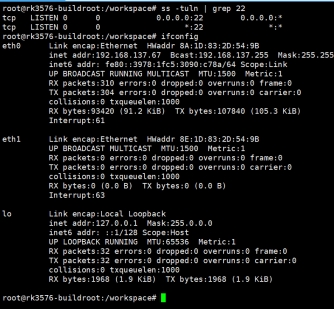
Connect to the Development Board

ifconfig

img

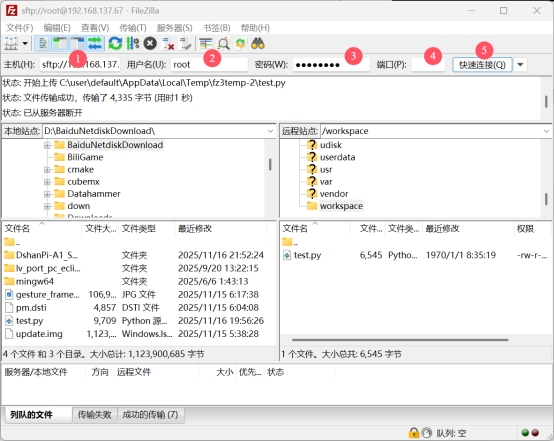
Connect using FileZilla:

  • IP: Development board IP address
  • Username: root
  • Password: rockchip
  • Port: 22

Summary

Looking back at the entire debugging process, the following key points are worth special attention:

  1. Display Path Selection: On systems running a compositor such as Weston, prioritize the GStreamer + waylandsink solution for displaying images, rather than directly operating the FrameBuffer.

  2. Camera Device Node: Be sure to use the v4l2-ctl --list-devices command to confirm the device node corresponding to the camera, and specify it correctly in the code.

  3. Screen Resolution: Note that the screen resolution detected by the system (which can be queried via cat /sys/class/drm/card0-DSI-1/modes) may be slightly different from the physical resolution. When creating display frames, use this as the reference or make adjustments accordingly.

At this point, we have successfully set up the gesture recognition programming environment on the Dshanpi A1 development board and resolved the display issues with the MIPI screen and camera. Although the process was full of twists and turns, it laid a solid foundation for the subsequent actual writing of gesture recognition algorithms. I hope my experience can be of help to everyone!